#
Setting Up Your SillyTavern
Okay, your instance is live! This guide will take you through the final steps to get everything connected and optimized for the best possible chat experience.
#
Part 1: Connecting to OpenRouter
First, let's tell SillyTavern how to talk to the AI models.
#
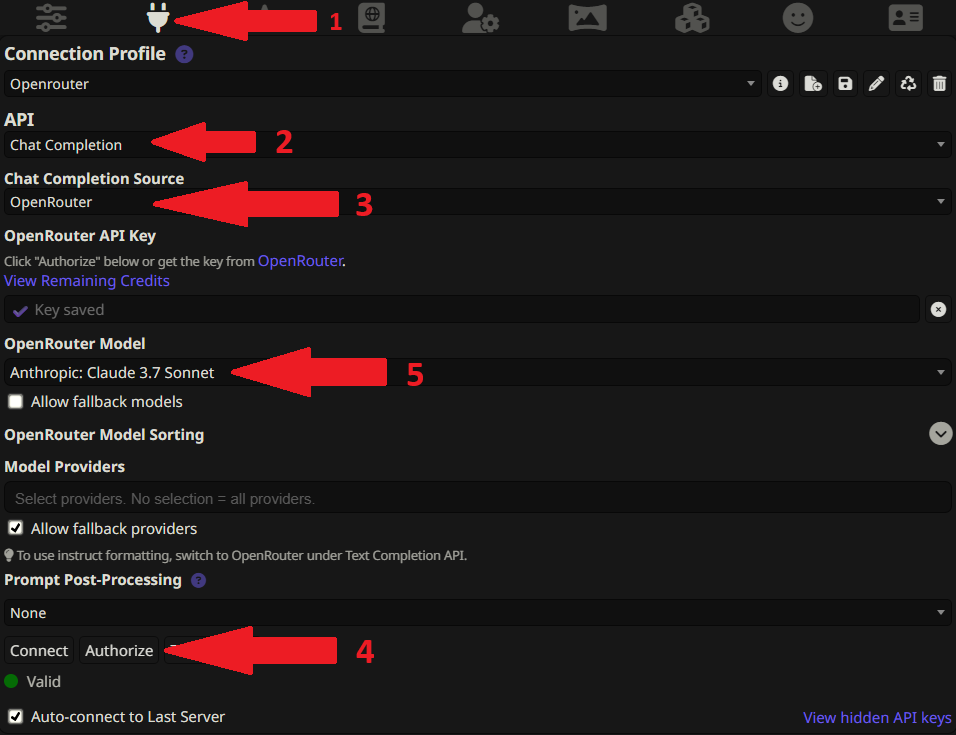
Step 1: Open API Connections
Once you're logged into your SillyTavern instance, look for the API settings button in the top bar. It usually looks like a plug or a cloud icon. Click it.
#
Step 2: Connect to OpenRouter
This part is super easy.
- For the API, make sure 'Chat Completion' is selected.
- For the Source, select 'OpenRouter' from the dropdown list.
- Click the "Authorize" button. A new window will pop up asking you to log into OpenRouter and approve the connection.
- Once authorized, click the big "Connect" button. A new model dropdown menu should appear. If it does, you're connected!
- Choose your preferred model from the dropdown. You can check the OpenRouter models page to see what's available.
#
Part 2: Supercharging Your Prompts & Jailbreaks
This is the secret sauce. A good preset dramatically improves the AI's creativity, coherence, and ability to follow instructions for roleplaying.
#
Recommended Presets
Here are some of the best places to find amazing presets. Remember to look for the .json download link!
- Official SillyTavern Discord: A goldmine for community-created presets. https://discord.gg/sillytavern
- Smiley's Presets (Sal's Choice): Incredible for both SFW/NSFW roleplay and uses advanced features. https://rentry.org/SmileyJB
- Pixi's Universal Prompts: A fantastic resource and inspiration. https://pixibots.neocities.org/#prompts/pixijb
#
How to Import a Preset
Most preset creators will provide a .json file for you to download. To import it into SillyTavern:
- In the top bar, click the "Settings" icon to open the "Chat Completion Presets" panel.
- At the top of this panel, find the "Import" button.
- Click it and upload the
.jsonfile you downloaded. The settings will be applied instantly. - Give the preset a name at the top of the panel and click "Save".

#
Activating Advanced Presets (like SmileyJB's with Regex)
Some of the most powerful presets require an extra step to work correctly. For example, many of Smiley's presets use the Regex extension to modify the prompt on the fly.
Here’s how to set it up:
Go to the Extensions Panel: In the top bar, click the icon that looks like a puzzle piece (🧩) to open the "Extensions" panel.
Import the JSON File: In the Regex section, click the "Import" button and upload the
.jsonfile you downloaded from Smiley's Rentry page. This will add the Regex extension to your SillyTavern instance and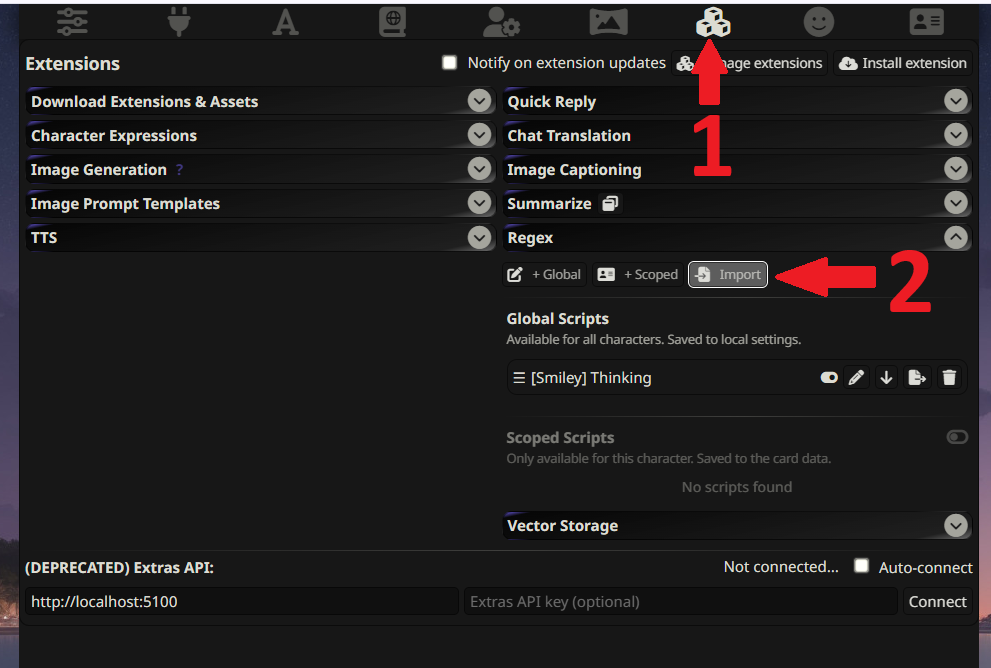
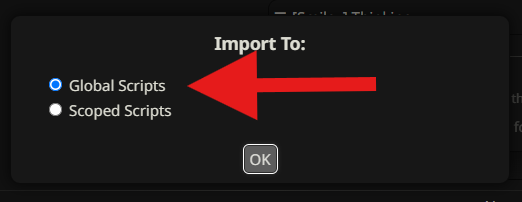
Choose 'Global' for Regex: Make sure to select 'Global' in the Regex section. This ensures that the Regex rules apply to all chats, not just specific ones.
#
Part 3: Configuring the Preset
Now that you've imported the preset, you need to configure it properly:
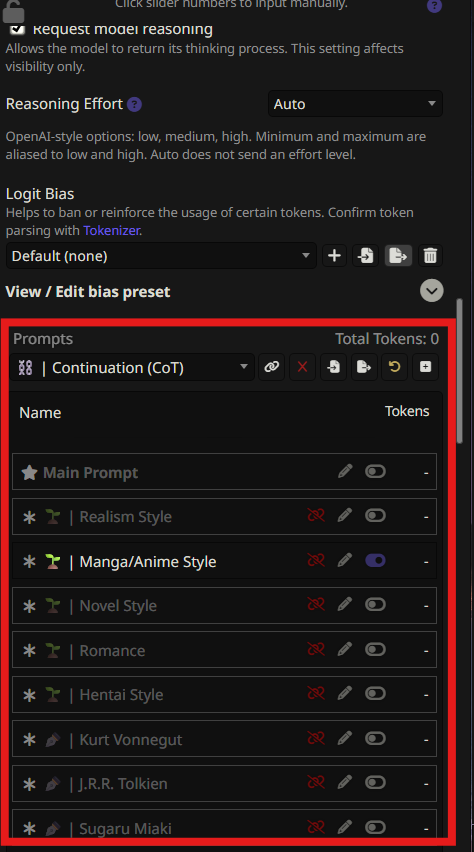
Open Chat Completion Presets: Click the "Settings" icon in the top bar and select "Chat Completion Presets".
Select Your Imported Preset: Choose the preset you just imported from the dropdown menu.
Configure the Settings: Scroll down to the bottom of the panel. You'll see various toggles and options that need to be configured according to the preset's documentation.
Follow the Documentation: Each preset comes with specific instructions on which settings to enable/disable. Check the creator's documentation (like Smiley's Rentry page) for the exact configuration needed.
Save Your Changes: Once you've configured all the settings according to the documentation, click "Save" to apply your changes.
#
You're Done! For Real This Time!
That's it. Your instance is connected, and your prompts are supercharged. You are now 100% ready to have the best possible AI chat experience.
Go find a character, and have fun! You've earned it.